


Wednesday, August 29, 2012

Jelly Bean Search Widgets for android
 2:35 PM
 samsungapps


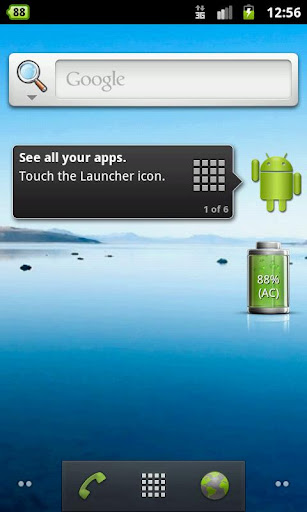
Get the JB search widget on any device now in your favorite color!
This
app contains a search widget pack that clones the official search bar
found in Android 4.1 Jelly Bean. JB Search includes all sorts of colors
to fit anyone’s taste, and the best part is they’re all free for you to
enjoy and show off to your friends!
Features:
★ Universal search widget pack
★ Official 4.1 search bar clone
★ Leads to system Google/voice search
★ 9 vibrant semi-transparent colors
★ Fit to screen
★ Re-sizable
★ Landscape/portrait mode
★ Compatible with all launchers
★ Supports all screen resolutions
★ Small APK size
★ 0% battery drain
★ Official 4.1 search bar clone
★ Leads to system Google/voice search
★ 9 vibrant semi-transparent colors
★ Fit to screen
★ Re-sizable
★ Landscape/portrait mode
★ Compatible with all launchers
★ Supports all screen resolutions
★ Small APK size
★ 0% battery drain
Colors:
★ Stock (white)
★ Black
★ Blue
★ Green
★ ICS-Blue
★ Orange
★ Pink
★ Purple
★ Red
★ Black
★ Blue
★ Green
★ ICS-Blue
★ Orange
★ Pink
★ Purple
★ Red
More Info:
To
apply a JB search widget, long-press on your home screen and select the
widgets button in the pop-up, then scroll down to J and select the
color of your choice (if you are on 3.0/4.0+ the widget menu can be
found in your app drawer)
Metro Ui HD Widget Tile Win 8 apk for android
2:31 PM
samsungapps
MetroUI HD - Turn your cell phone / tablet in the new Metro design
Until 2. Sep 50% off!
With just a few easy steps, you create a demanding HD MetroUI surface.
Please
note that you may have another launcher (like Nova Launcher, Go
Launcher etc.) should be installed as the default launcher screen
settings do not allow to achieve the best possible result.
Each widget can be customized in color, font size, vibration, and sound.
Also offers various MetroUI HD live widgets, such as
Calendar
Clock
Analog Clock
Facebook Tile
Gallery Tile
SMS InBox Tile
and Music Tile.
Clock
Analog Clock
Facebook Tile
Gallery Tile
SMS InBox Tile
and Music Tile.
Please
note that you may have another launcher (like Nova Launcher, Go
Launcher etc.) should be installed as the default launcher screen
settings do not allow to achieve the best possible result.


Tuesday, August 28, 2012
Download and install Update Galaxy S GTI9000 with Stable Jellybean 4.1.1 Firmware
8:59 AM
samsungapps
If you are having the Samsung Galaxy S GT I9000 smartphone and are
wondering on why in the race of Android, not many of the users are
bothering about the jellybean 4.1 update for the SGS then you got to
think a bit on this thought as developers are working hard to come up
with the stable Jellybean ports for SGS and on the similar lines we will
be checking out on how you can easily install this all new Jellybean
4.1.1 port which resembles more of a Galaxy Nexus port and is the stable
update. Please note that this is not an Official firmware update
released by Samsung Electronics and unfortunately there won’t be any
official Jellybean update for I9000 device.
Disclaimer: We should not be held responsible or liable for any damage happened to your device due to not following the instructions. It is very unlikely that there will be any damage to your device if you follow all the instructions.
In the due course of this article we will be checking out on what are
the change logs of this firmware along with the detailed pre requisites
and a simple guide which will assist you to apply this firmware in your
device.
Change Log of RC 10 Update:
- Faster & smooth
- Yaos updater by Dexafree
- Fix bright
- Fix wifi
- G.Settings integrated in settings
- external Sd on Pc
- Compass
- Log cat
- Fix “omv (r)” thanks to Javipm (htcmania)
- Improved Ril
- Kernel Semaphore 2.0.6
- Optimized script
- Various minor fixed’s
- Yaos updater by Dexafree
- Fix bright
- Fix wifi
- G.Settings integrated in settings
- external Sd on Pc
- Compass
- Log cat
- Fix “omv (r)” thanks to Javipm (htcmania)
- Improved Ril
- Kernel Semaphore 2.0.6
- Optimized script
- Various minor fixed’s


With the help of below mentioned steps, you will have to back up all
the user level data present in your phone. Don’t make use of the KIES PC
Suite for backing up the data as sometimes you may face issues with the
tool. Manual backup is the safe backup, once you back up the data, move
the target files to your computer.
SMS – Use “SMS Backup & Restore app”,
Contacts – Sync with the Gmail application,
Call Log - Call Log and Restore
Images, Songs, Videos, Files – Copy to internal / External SD Card,
APN and MMS Settings – Note down from the path “Applications > Settings > Wireless and Network > Mobile Networks > Access Point Names”
Antivirus tools may interrupt the process of firmware update process
iny uor phone, so its better to disable / uninstall the same. From the
path “Settings > Applications > Development > USB debugging”,
you will have to enable the USB Debugging Mode. Also, ensure that you
have a minimum of 40% battery charge left so as to make sure that the
device doesn’t get turned off in the middle of rooting process.
So assuming that you have followed all the above mentioned
instructions, you can now head over to the next step where we have
summed up a detailed guide on how to apply this firmware update.
Procedure to update Galaxy S GT I9000 with Jellybean 4.1.1 Firmware:
- First up check on whether your device is rooted or not. To check, download “Root Checker” app from the PLAY Store and check on whether the device is rooted or not. Please note that just in case if you haven’t updated rooted your device then with the help of below links you can easily update and root the device.
- Now, assuming that you have rooted your phone successfully, you can now head over to downloading the Jellybean 4.1.1 Package and Google Apps Package from here to your computer. Once you have downloaded, connect your device to the computer with the help of USB cable and place these two zip files in your computer. Once placed, disconnect the Galaxy S smartphone and turn Off the device so that it can be entered in the recovery mode.
- Samsung Galaxy S can be entered in the recovery mode by pressing the Volume Up Key, Center button, and holding both simultaneously press the Power Button. If the device boots up in the normal mode, then try again the above process to get your Galaxy S I9000 in recovery mode. Please note that if you apply on any other Galaxy S variant then there is a possibility that you might just brick the device.
- In recovery mode, select Wipe data/factory reset and also you need to select Wipe Cache partition and then reboot your device by selecting reboot system now with the help of Volume rocker keys so that all the cache data will be wiped Off completely.
- Select “install zip from sd card” > “choose zip from sd card” and then choose the Jellybean 4.1.1 firmware package and then the Google Apps Package to select “Yes” with the help of Volume rocker keys and Menu button. Once the file is selected, it will take around 5 – 7 minutes for applying the same. Once the update is applied, select “go back” and then “reboot system now”.
Note: If the device gets into the boot loop sequence or say gets stuck in the welcome screen, just re insert the battery and re follow the above instructions so as to again follow the above mentioned instructions.
Do share with us in the comments section so that just in case if you
face any issues faced in the process of applying this update as we will
try our level best to sort out the same. Congratulations, you have now
successfully updated your Galaxy S GT I9000 with the latest Jellybean
4.1.1 firmware version.
Monday, August 27, 2012
Samsung Galaxy S3 Secret codes
6:31 PM
samsungapps

*#1234# (View SW Version PDA, CSC, MODEM)
*#0*# (General Test Mode)
*#12580369# (SW & HW Info)
*#197328640# (Service Mode)
*#0228# (ADC Reading)
*#32489# (Ciphering Info)
*#232337# (Bluetooth Address)
*#232331# (Bluetooth Test Mode)
*#232338# (WLAN MAC Address)
*#232339# (WLAN Test Mode)
*#0842# (Vibra Motor Test Mode)
*#0782# (Real Time Clock Test)
*#0673# (Audio Test Mode)
*#2263# (RF Band Selection)
*#9090# (Diagnostic ConfiguratioN)
*#7284# (USB I2C Mode Control)
*#872564# (USB Logging Control)
*#4238378# (GCF Configuration)
*#0283# (Audio Loopback Control)
*#1575# (GPS Control Menu)
*#3214789650# (LBS Test Mode)
*#745# (RIL Dump Menu)
*#746# (Debug Dump Menu)
*#9900# (System Dump Mode)
*#44336# (Sofware Version Info)
*#7780# (Factory Reset)
*27673855# (Full Factory Reset)
*#0289# (Melody Test Mode)
*#2663# (TSP / TSK firmware update)
*#03# (NAND Flash S/N)
*#0589# (Light Sensor Test Mode)
*#0588# (Proximity Sensor Test Mode)
*#2732832553282*# (Data Create Menu)
*#273283255663282*# (Data Create SD Card)
*#3282727336*# (Data Usage Status)
*#7594# (Remap Shutdown to End Call TSK)
*#34971539# (Camera Firmware Update)
*#526# (WLAN Engineering Mode)
*#528# (WLAN Engineering Mode)
*#7412365# (Camera Firmware Menu)
*#80# (Unknown)
*#07# (Test History)
*#3214789# (GCF Mode Status)
*#272886# (Auto Answer Selection)
*#8736364# (OTA Update Menu)
*#301279# (HSDPA/HSUPA Control Menu)
*#7353# (Quick Test Menu)
*27674387264636# (Sellout SMS / PCODE view)
*#7465625# (View Phone Lock Status)
*7465625638*# (Configure Network Lock MCC/MNC)
#7465625638*# (Insert Network Lock Keycode)
*7465625782*# (Configure Network Lock NSP)
#7465625782*# (Insert Partitial Network Lock Keycode)
*746562577*# (Insert Network Lock Keycode SP)
#746562577*# (Insert Operator Lock Keycode)
*746562527*# (Insert Network Lock Keycode NSP/CP)
#746562527*# (Insert Content Provider Keycode)
*#272imei#* Product code

Among all those 58 key codes, there is one which is very important for every new owners of SGS3. That key is *#0*# which is a general test to find out basic current state of phone’s LCD. We knew that LCD is the most important aspect of a touch-based smartphone. Anyway, just give it a try..


Titanium Backup Pro apk - android app
5:00 PM
samsungapps


More Titanium power: Apps freezer, multi backups, 0-click restore and WAY MORE!
O━┳┳┳ · Your PRO Key for Titanium Backup!
• Voted #1 TOP ROOT APP on Twitter.
• Check out the Pro DEMO VIDEO below!
• No icon! Requires the Titanium Backup (free) app (see "More" section below). This key will turn it into PRO.
• The same key can be used on several devices!
• For download issues & support: read below.
• Check out the Pro DEMO VIDEO below!
• No icon! Requires the Titanium Backup (free) app (see "More" section below). This key will turn it into PRO.
• The same key can be used on several devices!
• For download issues & support: read below.
PRO Features Added:
[✔] Multiple backups per app
[✔] 0-click batch restore
[✔] Backup/restore SMS,MMS,calls,bookmarks,Wi-Fi AP as XML
[✔] Multi-user support for some apps! (eg: games)
[✔] Batch verification
[✔] Backup apps without closing them!
[✔] Restore individual apps+data from CWM backups!
[✔] Restore individual apps+data from TWRP backups!
[✔] Hypershell speed
[✔] Migrate system data across different ROMs
[✔] Market Doctor (relink apps to Market)
[✔] "Destroy all Market links" feature
[✔] Apps freezer (incl. batch support)
[✔] Market "auto updating" manager
[✔] Convert user apps <=> system apps
[✔] Encryption
[✔] Unlimited schedules
[✔] Sync to/from Dropbox (manual/scheduled)
[✔] Sync to/from Box (manual/scheduled)
[✔] Sync to/from Google Drive (manual/scheduled)
[✔] Load/Save a Filter and use it in Widgets/Schedules
[✔] Change the device's Android ID, restore it from a backup or after a factory reset
[✔] Protect backup against deletion
[✔] Send backup (to e-mail/cloud) and import it in 1 click
[✔] Backup→Verify→Un-install an app in one shot
[✔] Freeze/defrost/launch apps in a single click
[✔] CSV export any app DB (e-mail or Google Docs)
[✔] Brand the app with your name
[✔] Bloatware Melter (experimental)
[✔] Convert app data to/from faster WAL DB format
[✔] And more!
More Memory:
[✔] Dalvik cache cleaner
[✔] Integrate system app updates into ROM
[✔] Move apps into ROM
[✔] Integrate Dalvik cache system elements into ROM
[✔] Dalvik cache cleaner
[✔] Integrate system app updates into ROM
[✔] Move apps into ROM
[✔] Integrate Dalvik cache system elements into ROM
What the Press says:
"The Most Essential App For Android" - Tech'n'Life
"NONE can compare with this one" - Android Market Review
"The Best Backup App for Android" - Lifehacker
"The hands down best Backup on the market" - Absolutely Android
"It is a must-have backup app" - Droid Ninja
"The Most Essential App For Android" - Tech'n'Life
"NONE can compare with this one" - Android Market Review
"The Best Backup App for Android" - Lifehacker
"The hands down best Backup on the market" - Absolutely Android
"It is a must-have backup app" - Droid Ninja
Support & Upgrades:
• All upgrades are FREE.
• If Market won't download your PRO key: although credit card authorization *usually* occurs instantly, in rare cases it may need up to a few hours to complete. Try the Web version of Play Store. If problem persists, login at checkout.google.com to cancel your order & try again.
• If your PRO key got installed before the purchase completed or otherwise won't work, please un-install & reinstall your PRO key to resolve the problem.
• We aren't responsible for any currency conversion fees charged by credit card issuers.
Download
1 First, install Titanium Backup 5.3.0 apk
2.install Titanium backup pro key 1.2.1.apk 3.Lucky Patcher Apply the patch with the specific
3.Lucky Patcher Apply the patch with the specific.


Android blue hd theme for samsung wave Y,wave M
4:31 PM
samsungapps


Android blue hd theme.it has hd wallpaper+nice hd icons such a nice theme for wave Y,M..
This theme is supported on the following Samsung phones:
- S5380 Wave Y (Bada 2.0)
- S7250 Wave M (Bada 2.0)
How to Root Samsung Galaxy Note 10.1
4:08 PM
samsungapps

Samsung Galaxy Note 10.1 device can now be rooted as we hear that
developers are geared up and are coming up with the custom ROM firmware.
And if you are the one who has managed to purchase this all new smart
device, you can now easily install these custom ROM firmware but before
this you will have to root the device. Over a period of this article we
will be checking out on how you can root the device with the help of a
simple tutorial. Once the device is rooted, the warranty will get void
and the only way with which you can restore the lost warranty is by re
applying the official firmware. Rooting allows you to not just install
the custom ROM firmwares but also allows you to install the apps which
requires the root access.
Disclaimer: We should not be held responsible or liable for any damage happened to your device due to not following the instructions. It is very unlikely that there will be any damage to your device if you follow all the instructions.
- Backup all the data present in your Galaxy Note with the help of the below mentioned steps just to make sure that if any data loss or corruption happens, the same can be restored with the help of below mentioned steps.
SMS – Use “SMS Backup & Restore app”,
Contacts – Sync with the Gmail application,
Call Log - Call Log and Restore
Images, Songs, Videos, Files – Copy to internal / External SD Card,
APN and MMS Settings – Note down from the path “Applications > Settings > Wireless and Network > Mobile Networks > Access Point Names”
- From the path “Settings > Applications > Development > USB debugging”, you will have to enable the USB Debugging Mode. Also, ensure that you have a minimum of 40% battery charge left so as to make sure that the device doesn’t get turned off in the middle of rooting process. Disable / Uninstall the security suites as it may interrupt the process of rooting.
- Also, note down the current firmware version from the path “Settings > About Device > Firmware Version” so that to unroot you can apply the same update again. Though rooting won’t change the firmware version, it’s better to note down as after rooting you may install the custom ROM firmware.
So assuming that you have followed all the above mentioned
instructions, you can now head over to the next page where we have
summed up a detailed tutorial on how to root your Galaxy Note 10.1
device.
Procedure to Root Galaxy Note 10.1:
- First up you will have to turn Off your Galaxy Note 10.1 device so that it can be entered in the download mode. The download mode in Galaxy Note 10.1 device can be entered by pressing the Volume Down button and then at the same time press the Power button for round about 10 – 15 seconds to enter the device in the download mode.
- Once you see the Warning Screen, press the Volume Up button to enter the device in the download mode. Now, connect your Galaxy Note to the computer with the help of Original USB cable to the computer.
- Download Odin and along with the below mentioned appropriate rooting package.
Download XXLGA Stock European Firmware with Root injected
Download XWALG7 Stock Saudi Arabian/UnitedEmirates Firmware with Root injected
Download UEALGB GT-N8013 Firmware with Root injected
Download XWALG7 Stock Saudi Arabian/UnitedEmirates Firmware with Root injected
Download UEALGB GT-N8013 Firmware with Root injected
- Once you have downloaded the above mentioned files and extracted the same, open Odin in your computer and connect your Galaxy Note 10.1 device to the computer with the original USB cable.
- Now, click on the “PDA” button in Odin and select the tar file which you got after extracting the firmware root package. Once selected, it will take around 4 -5 minutes for applying the same. Once the firmware is applied successfully, you will see that it will take around 4 – 5minutes for booting up the device as it’s the first boot after the rooting.
Note: If the device gets into the boot loop sequence or say gets stuck in the welcome screen, just re insert the battery and re follow the above instructions so as to again follow the above mentioned instructions.
- Now, to check on whether the device is rooted or not, download the “Root Checker” app from the Google PLAY Store and check on whether the device is rooted or not. If the device is not rooted then you will have to follow the above instructions again.
Do share with us in the comments section just in case if you face any
issues as we will try our level best to sort out the same.
Congratulations, you have now successfully rooted your Galaxy Note 10.1
device, we will very soon be coming up with the custom ROM firmware
articles which will help you to make the most out of your device.
Download and install - update Samsung Fascinate with AOKP Jellybean 4.1.1 Firmware
4:04 PM
samsungapps

Procedure to Update Samsung Fascinate with AOKP Based Jellybean 4.1.1 Firmware Update:
- Download the AOKP Jellybean 4.1.1 Firmware Package & Google Apps package from here to your computer. Once downloaded, you now will have to connect your phone to the computer with the help of original USB cable and place these two zip files in your phone.
- Disconnect the device and turn off the phone so that it can be entered in the recovery mode. You can also enter into the recovery mode with the help of the ROM Manager app which you can download from the Google PLAY Store.
- Samsung Fascinate smartphone can be entered in the recovery mode pressing and holding the Volume Up + Volume Down and then press the Power button to enter the device in the recovery mode. In recovery mode, you need to select “install zip from sd card” > “choose zip from sd card” to select the Jellybean 4.1.1 firmware package and then the Google Apps package.
- Once the file is selected, it will take around 4 -5 minutes for applying the update. It will take longer time than expected for the device to reboot as it’s the first time the device will be booted. It may get stuck on the Samsung or VZW Logo for quite a while.
Note: If the device gets into the boot loop sequence or say gets stuck in the welcome screen, just re insert the battery and re follow the above instructions so as to again follow the above mentioned instructions.
So to check now whether the firmware is updated successfully or not,
you can check the same from the path “Settings > About Phone and
Firmware version”. Do share with us in the comments section just in case
if you face any issues as we will try our level best to sort out the
same.
Download and install - update Galaxy S3 GT I9300 with Latest Jellybean 4.1.1 XXDLH7 Firmware
4:01 PM
samsungapps
Procedure to Update Galaxy S3 GT I9300 with XXDLH7 Jellybean 4.1.1 Firmware Update:
- Download XXDLH7 Jellybean 4.1.1 Firmware Package and Odin for Galaxy S3 GT I9300 from here to your computer. Once downloaded, extract he same to get the Odin executable file and I9300XXDLH7_I9300OXADLH7_I9300XXLH7_HOME.tar.md5 file.
- Open Odin executable file from here to your computer. Once opened, you will have to turn Off your Galaxy S3 device.
- Download mode in Galaxy S III GT I9300 can be entered by pressing Volume down Key, Center button, and holding both simultaneously press the Power Button after which a green robot will be shown indicating the Download Mode has been entered.
- Connect your Galaxy S3 with your computer / Laptop and then in Odin you will see that the ID : COM section will turn Yellow indicating that all the drivers are installed successfully.
Note: If ID : COM section doesn’t turn Yellow, you need to check with two things which are mentioned below,
- Install the USB Drivers in your computer &
- Go to the Path “Settings > Wireless & Network > USB Settings” and ensure that “Samsung KIES” option is ticked before connecting the phone to the computer.
- Once it’s done, click on “PDA” to select “I9300XXDLH7_I9300OXADLH7_I9300XXLH7_HOME.tar.md5” and then proceed to clicking on “Start”. It will take around 4 -5 minutes for applying the update and once it’s successfully updated the device will be shown with the Language selection settings etc.
- Please note that initially it will take more than 4 -5 minutes for turning the device ON and will get stuck on the S Logo for a while.
Note: If the device gets into the boot loop sequence or say gets stuck in the welcome screen, just re insert the battery and re follow the above instructions so as to again follow the above mentioned instructions.
Do share with us in the comments section just in case if you face any
issues as we will try our level best to sort out the same.
Congratulations, you have now successfully applied the update of latest
Jellybean 4.1.1 firmware which you can check the same from the path
“Settings > About Phone and Firmware version”.
Download and install - Manual Update T-Mobile Galaxy S3 T999 with Jellybean 4.1.1 OTA Firmware
3:58 PM
samsungapps

Procedure to Update T-Mobile Galaxy S III T999 with Jellybean 4.1.1 Firmware Version:
- First up download Jellybean 4.1.1 Firmware Package from here to your computer. Once downloaded, connect your device to the computer with the help of original USB cable and then place the downloaded zip file in your device. Ensure that you are not placing the zip file deep into the sub folders.
- Disconnect the T-Mobile Galaxy S III T999 from the computer and turn off your device so that it can be entered in the recovery mode. You can also enter into the recovery mode with the help of the ROM Manager app by selecting the option called “Reboot into Recovery Mode”.
- T-Mobile Galaxy S III T999 can be entered in the recovery mode pressing and holding the Volume Up + Volume Down and then press the Power button to enter the device in the recovery mode. In recovery mode, you need to select “install zip from sd card” > “choose zip from sd card” to select the Jellybean 4.1.1 firmware package.
- Once the zip file is selected, it will take around 4 -5 minutes for applying this update. Once the update is applied successfully, it will be rebooted. The whole process of device update will take around 4 – 5 minutes. Also, for the first reboot of the device, it will take some time as whole system files will have to be setup.
Note: If the device gets into the boot loop sequence or say gets stuck in the welcome screen, just re insert the battery and re follow the above instructions so as to again follow the above mentioned instructions.
Do share with us in the comments section just in case if you face any
issues as we will try our level best to sort out the same.
Congratulations, you have now successfully applied the update of
Jellybean 4.1.1 firmware in your T-Mobile Galaxy S III T999.
Download and install - update Galaxy Tab 750 P7500 with Official ICS 4.0.4 Firmware
3:54 PM
samsungapps

Procedure to Update Galaxy Tab 750 with Official ICS 4.0.4 XWLP5 Firmware:
- Download the ICS 4.0.4 XWLP5 Firmware Package & Odin from here to your computer. Once downloaded, you now will have to extract both the zip files in your computer. Once extracted, you will have to open the Odin in your computer.
- Now, turn off your Galaxy Tab so that it can be then entered in the download mode. The download mode can be entered successfully by holding the volume down button you will have to switch ON the device. Now, select the download mode from the shown option.
- Connect the Galaxy Tab 750 with the help of the USB cable with the computer while the Odin is opened in the computer. Now, once its connected, you will see that ID : COM Section will turn yellow which will indicate that all the drivers have been successfully installed in your computer and you are ready to proceed to the next step. In Odin, Auto Reboot, F. Reset Time options & Re-Partition option should be unticked.
- In Odin, Click on “PDA” to select “P7500XWLP5_P7500ODDLP5_P7500XXLQ8_INU_ONLY_HOME.tar.md5” and then proceed to click on “Start”. It will take around 3 – 6 minutes for applying the update and once it’s successfully updated the device will be shown with the Language selection settings etc.
- Please note that in the process of device restart, it may take more than 3 -4 minutes for rebooting the device which is normal as it’s the first time the device is booting after the firmware update.
- Just in case if the device gets any force close errors then you will have to enter the device in the recovery mode and clear the cache and wipe the data. The recovery mode can be entered successfully by holding the volume down button you will have to switch ON the device. Now, select the recovery mode from the shown option.
Note: If the device gets into the boot loop sequence or say gets stuck in the welcome screen, just re insert the battery and re follow the above instructions so as to again follow the above mentioned instructions.
So, once the device is restarted you can check on whether the device
has been updated or not from the path “Settings > About Device >
Build Number”. Do share with us in the comments section just in case if
you face any issues as we will try our level best to sort out the same.
Congratulations you have now successfully applied the update in your
device.
Sunday, August 26, 2012
Manic Miner: ZX Spectrum (bada - wave game)
12:27 PM
samsungapps


Manic Miner for the ZX Spectrum (an 8-bit personal home computer released in the UK in 1982 by Sinclair Research Ltd, which sold in excess of 5 million units worldwide) is one of THE defining games of the 1980s. Manic Miner: ZX Spectrum is offered as an in-app purchase from within the ZX Spectrum: Elite Collection app. (The in-app is priced at £1.49/€1.59/US$1.99 and includes 5 more ZX Spectrum games). Manic Miner: ZX Spectrum is also available in this stand-alone form but does not include any other ZX Spectrum games. Manic Miner: ZX Spectrum is the 100% original ZX Spectrum game, as written by Matthew Smith in 1983 and is brought to you - as an officially licenced product - utilizing our ZX Spectrum: Elite Collection technology. Featuring: - portrait and landscape play / display modes - iDaptive (user-definable, game-specific joystick, keypad) Controls - ‘auto save’, on exiting the game - authentic 'Spectrum' sound - Choice of 48k or 128k style keys - Choice of Standard or Infinite lives mode of play Manic Miner is a platform game originally written for the ZX Spectrum by Matthew Smith and released by Bug-Byte in 1983 (later re-released by Software Projects). It is the first game in the Miner Willy series and among the pioneers of the platform game genre. The game itself was inspired by the Atari 800 game Miner 2049er. It has since been ported to numerous home computers and video game consoles. At the time, its stand-out features included in-game music and sound effects, excellent playability, and colourful graphics, which were well designed for the graphical limitations of the ZX Spectrum. On the Spectrum this was the first game with in-game music, the playing of which required constant CPU attention and was thought impossible. It was cleverly achieved by constantly alternating CPU time between the music and the game (which accounts for the music's stuttery rhythm). The in-game music is In the Hall of the Mountain King from Edvard Grieg's music to Henrik Ibsen's play Peer Gynt. The music that plays during the title screen is an arrangement of An der schönen blauen Donau (popularly known as The Blue Danube), a waltz by Johann Strauß. Manic Miner for the ZX Spectrum contains the following 20 rooms: 1. Central Cavern 2. The Cold Room 3. The Menagerie 4. Abandoned Uranium Workings 5. Eugene's Lair 6. Processing Plant 7. The Vat 8. Miner Willy meets the Kong Beast 9. Wacky Amoebatrons 10. The Endorian Forest 11. Attack of the Mutant Telephones 12. Return of the Alien Kong Beast 13. Ore Refinery 14. Skylab Landing Bay 15. The Bank 16. The Sixteenth Cavern 17. The Warehouse 18. Amoebatrons' Revenge 19. Solar Power Generator 20. The Final Barrier In each of the twenty caverns are several flashing objects, which the player must collect before Willy's oxygen supply runs out. Once the player has collected the objects in one cavern, they must then go to the now-flashing portal, which will take them to the next cavern. The player must avoid enemies (listed in the cassette inlay) as Poisonous Pansies, Spiders, Slime, and Manic Mining Robots, which move backwards and forwards along a predefined length at constant speeds. Willy can also be killed by falling too far, so players must time the precision of jumps and other movements to prevent such falls or collisions with the enemies. The game ends when the player has no lives left, extra lives are gained every 10000 points. Matthew Smith (born 1966) is a British computer game programmer. He is best known for his games Manic Miner and Jet Set Willy for the ZX Spectrum, released in 1983 and 1984 respectively. Manic Miner and Jet Set Willy are two of the most famous and popular ZX Spectrum games of all time. Matthew created this game when he was 17 ...
MaryDoctor (bada - wave game)
12:27 PM
samsungapps


The classic NES game: Mary doctor bada version. Sexual and visual entertainment in one, both include traditional function of Mary doctor and modern elements. Allows you to relax on vacation when at the parse of work and study. Move the capsule up and down and move around, when the horizontal or vertical direction, more than 4 or 4 capsules or viruses of the same color together, you can eliminate these capsules and viruses. When all of the viruses are eliminated, you are successed and Play fighting music at the same time.The Game also can move with the touch screen.